Cosmic galaxy soap is a melt-and-pour bar poured in colored layers so that every slice reads like a band of deep space, all blues and purples and magenta with a glittered crust on top. The look comes from a glycerin base, a few mica colors, and a slow, opposing-corner pour that merges the colors at the seam instead of stirring them into mud. It is one of the most satisfying melt-and-pour projects to cut open, because you never quite know how the layers landed until the first slice. The classic see-through galaxy depends on a clear, or transparent, base, which we no longer carry, so source a clear melt-and-pour base separately if that is the look you want; the mica powder and glitter are not part of our catalog either, so source those from a cosmetic-supply retailer. Lone Star carries other melt and pour soap bases and the soap-safe fragrance oil the recipe runs on.
This guide covers what to gather, the six steps from cut base to sliced bars, how to color and pour the layers cleanly, and how to keep the finished soap skin-safe and crisp in storage.
What You'll Need
Gather everything before you melt the first batch, because melt-and-pour sets as it cools and the layering moves quickly once you start pouring. The base sets the look: a clear base shows the glitter floating in the layer, while an opaque base gives a softer, frosted galaxy.
Supplies
Melt-and-Pour Soap Base
A glycerin base that melts, colors, and sets firm enough to slice. Lone Star carries a Goat's Milk melt-and-pour base for a soft, creamy galaxy; browse the melt and pour soap bases. For the classic see-through deep-space look you want a clear, or transparent, base, which we no longer carry, so source a clear melt-and-pour base separately.
Soap-Safe Fragrance Oil
The scent. Use an oil rated as soap-safe, or skin-safe, since the finished bar touches skin. Check the product page for skin and soap compatibility before you buy.
Mica Colorant
Cosmetic-grade mica in the shades you want; Lone Star does not carry mica powder, so source it separately. A blue, green, pink, and purple set gives the classic galaxy spread, but any deep-space palette works.
Cosmetic Glitter
For the starry dust on top of the layers. A biodegradable cosmetic glitter is the proper choice. Lone Star does not carry glitter, so source it separately.
Loaf Mold
A silicone loaf mold gives you a long block to slice into bars. A wooden sleeve around the silicone keeps the mold square while you pour.
Microwave-Safe Containers
A few heatproof cups or beakers for melting and for splitting the base into separate colors.
Soap Cutter or Knife
For chopping the base and slicing the finished loaf.
Cutting Board
A clean surface to chop the base on.
Stirring Utensil
A spatula, whisk, or spoon to blend in color and fragrance.
Rubbing Alcohol in a Spray Bottle
A spritz pops the surface bubbles between layers and helps each new layer bond to the last.
Cover your workspace before you start. Melted base and mica can both spill, and a covered surface makes cleanup quick.
How to Make Cosmic Galaxy Soap
Work one or two colors at a time and keep the rest of the base warm. The whole effect depends on pouring slowly and letting each layer set just enough to hold the next, so do not rush the stack.
Six Steps to a Layered Galaxy Swirl
-
1
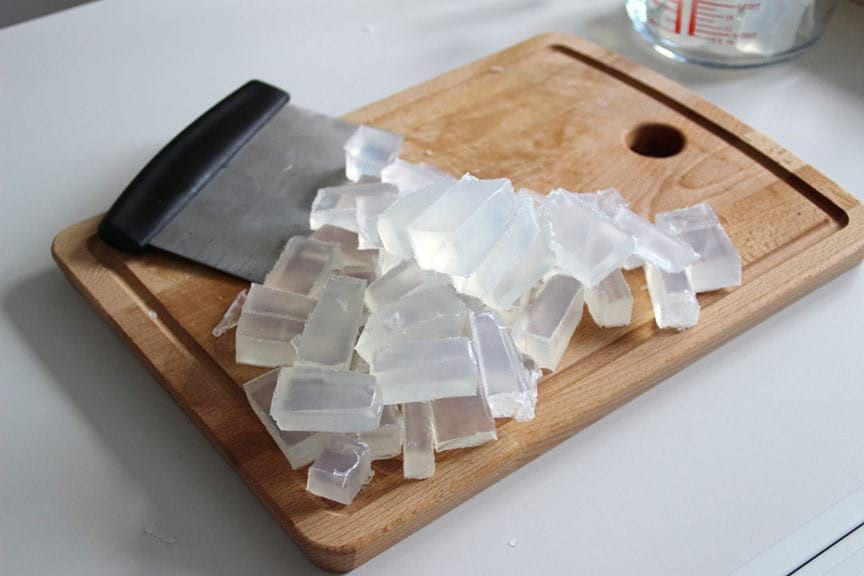
Cut the base into chunks
Remove the base from its packaging and chop it into roughly one-inch cubes on the cutting board. Smaller chunks melt faster and more evenly. Split the cut base across two microwave-safe containers so you can color two batches at once.
-
2
Melt the base
Microwave one container in short bursts until the chunks are fully liquid. Stir between bursts and stop heating as soon as the last piece melts. Let it cool to about 140°F, stirring to keep the consistency smooth, before you add color.

-
3
Color the layers
Pour the melted base into separate cups, one per color, and stir a little mica into each until the shade is even. Add your soap-safe fragrance oil and a pinch of glitter to each cup at the same time. Deep blues and purples anchor the galaxy look, with green and magenta for the bands between.

-
4
Pour the first layers
Pour two colors at once into the loaf mold, starting from opposing corners and moving slowly. The aim is to merge the colors gently at the seam, not to mix them all the way through. Spritz the top with rubbing alcohol to pop any surface bubbles.

-
5
Build the stack
Let each layer set slightly, then pour the next colors the same way. Spritz with rubbing alcohol between pours so the surface stays clear and each layer bonds to the one below. A loaf this size takes about seven layers, but you can pour as many as you like.

-
6
Cool, unmold, and slice
Once the loaf is full, let it cool until fully firm. Pop it out of the silicone mold and slice it into bars with the soap cutter. Each cut reveals a different cross-section of the galaxy.

Make It Your Own
The recipe is a frame, not a rule. Swap the palette for a sunset or an aurora, change the fragrance, or layer two soap bases for a translucent-over-opaque contrast. Because the glycerin in a melt-and-pour base pulls moisture from the air[2], wrap each finished bar once it is fully set: wrapped bars keep their crisp layers and stay dry until use.
Layering and coloring a melt-and-pour base is the same skill behind every project in the Melt & Pour Soap Recipes collection, and the same soap-safe oils scent How to Make Scented Bath Salts too. Browse more projects in the Learning Center.